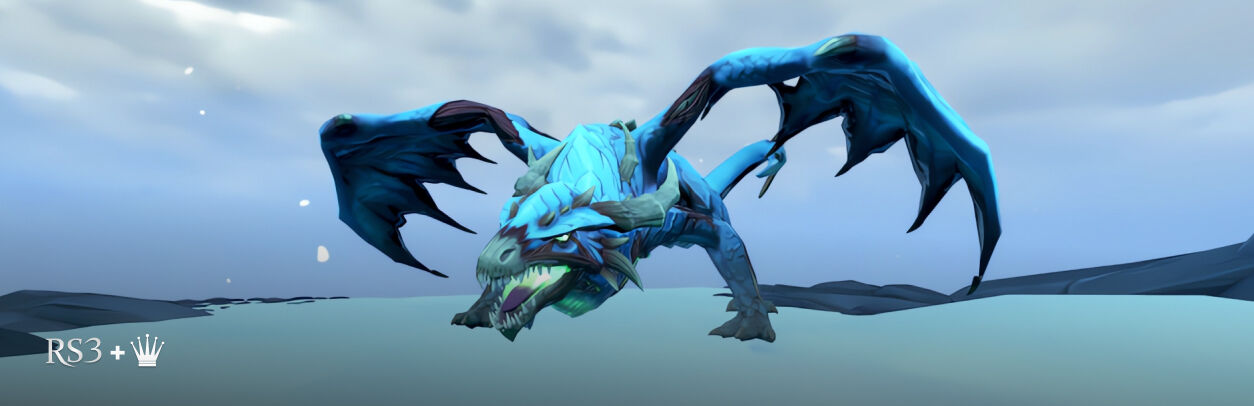
Despite all of your efforts in the Battle of Forinthry and your success in putting a stop to Zemouregal's undead army, there are still some things to be addressed: the undead dragon that's running loose for one. RS3 Requiem for a Dragon will take a look at Vorkath's ongoing story following the events of the battle. Fortunately, Chicks Gold has compiled all there is to know regarding this brand-new quest so you can be well prepared! We'll discuss the requirements, rewards, and all there is to know regarding this exciting new endeavor, so let's delay no further and get into it.
As we know, Zemouregal, despite being a powerful Necromancer, was unable to train Vorkath to bend to his will. This raised many questions: was he weakened? Was Vorkath more than he bargained for? This quest is set to answer some of these questions, informing us what power must have gone into the reanimation of the great beast. It will become your job to tame Vorkath or destroy him, but doing so will not be an easy task; you must understand the dragon wholeheartedly to have a chance at succeeding.
Requiem for a Dragon will see players returning to Ungael to hone their Necromancy abilities and gain a better understanding of the skill. It's essential to know that letting your guard down is not an option; in this quest series, you're not the only one in pursuit of power.
RS3 Requirements Requiem for a Dragon
Interestingly, your ability to embark on this adventure is solely based on the quests that you have completed; of course, that will bring with it some given skill requirements. Some of these are fairly high, so ensure you're well-prepared for this quest. Let's take a look at what exactly it is you'll need:
Skill Requirements
- 86 Archeology
- 66 Magic
- 75 Necromancy
- 54 Construction
- 10 Slayer
Quest Requirements
- Battle of Forinthry
- Ancient Awakening
- Dead and Buried
- Unwelcome Guests
- Murder on the Border
- Tomes of the Warlock
- The Spirit of War
- Vessel of the Harbinger
- Rune Mythos
- Necromancy!
- Ghosts Ahoy
- The Restless Ghost
- The Jack of Spades
- Diamond in the Rough
- Stolen Heart
- Kili Row
Item Requirements
- 30 White Marble
- 30 White Oak
- 5 Greater Ensouled Bars
- Ink
- Candles
It's also recommended to take the Archeology journal and the Sixth-Age circuit with you on your adventure; while it's not a requirement, they will certainly help you on your journey.
Enemies Ahead
In Requiem for a Dragon RS3, you'll face off against several level 85 enemies, or, if you're stealthy enough, you can avoid their advances. However, no matter your stealth skills, you will be battling the Spirit of Vengeance.
Taking Off in Requiem for a Dragon RS3
To get things underway, speak with Aster, and she will inform you that Vorkath being loose after the Battle of Forinthry has the general population on edge; she states that until he is destroyed, he will be a threat to the people of Gielinor. It has been indicated that the giant beast was seen flying to Ungael, and Aster requests that you investigate. She suggests weapons and armor to be equipped before you make the journey, then directs you to the rowboat by the Grove.
Arriving at Ungael
When you arrive, you will be met with a troop of eight Zamorakian scouts; they will be discussing their mission, which involves waiting for reinforcements before dealing with the dragon. You will also overhear them discussing their discomfort with their mysterious boss.
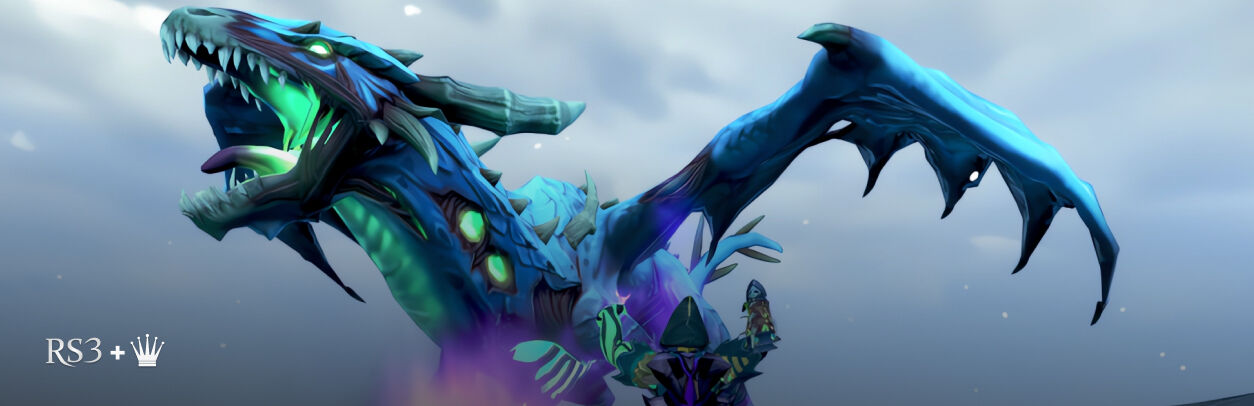
You'll then need to battle all eight of the scouts to progress with RS3 Requiem for a Dragon, and if you are killed during this encounter, you will respawn near the Grove inside Death's Office. Once you have defeated the scouts, make your way into the Colossal Cave, and you will find that the path beyond the cave takes you through some ruins; beyond them, you will find a cliff that resembles a necromancy ritual site. Here, you will see Vorkath, who is injured and far less hostile than when controlled by Zemouregal.
Approach the beast, and you will be given three options:
- Study the Creature (Neutral)
- Reach out your hand (Friendly)
- Slay the Beast (Aggressive)
Studying him will leave you wondering why he isn't attacking, choosing the friendly approach will make him flinch, and choosing to slay him will issue a secondary prompt asking if you want to engage in combat. Keep your hand outstretched, and Vorkath will release a wave of cold; if you continue to encourage him, the frost will intensify. Try not to shiver; with any luck, you will get him to relax enough for the frost to recede.
With the dragon now calm, move on to the next stage of Requiem for a Dragon in RS3, studying Vorkath. It will be obvious to you that he is suffering, and at this point, you will receive a fourth option, which is to lay the creature to rest. Sadly, when you attempt to use Necromancy to lay him to rest, his soul will not be able to pass on, appearing to be cursed.
Ask the creature what is wrong, and he will produce a crystal shard. If you inspect it, you will feel an unnatural energy radiating from the shard. You will then remember that the Archivist (Ungael) made notes on the creation of Vorkath, so make your way to the library and speak with the projection of it to learn more.
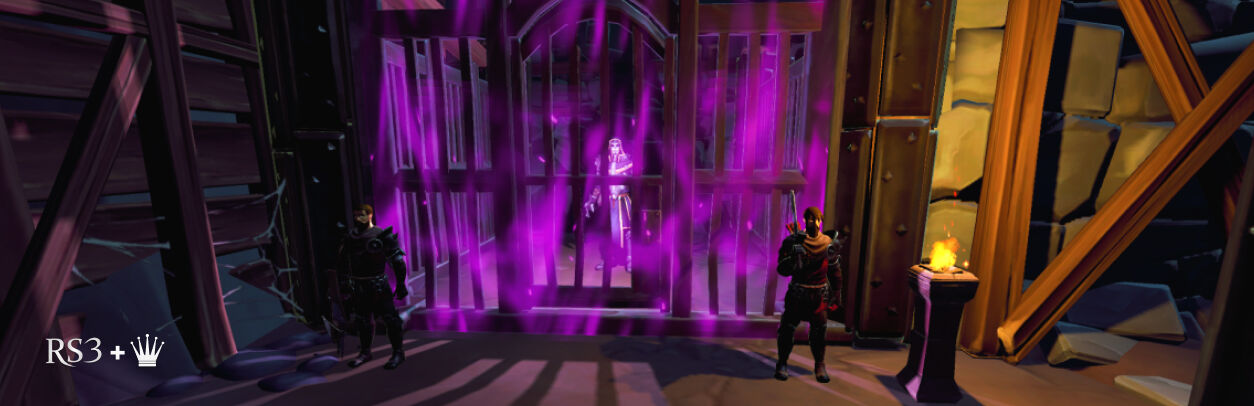
Make your way down the stairs that you entered via and head to the fortress through the eastern slope. Go into the ruins at the very top and continue through until you discover an Imposing Statue. You must then interact with the doorway on the south wall and head toward the library to the southwest. When you enter, you will instantly be attacked by a Zamorakian translator despite being unarmed. Defeat him, and he will drop his Zamorakian translator notes. Read them to discover he wasn't bad at translating the Archivist's words.
Your next Requiem for a Dragon RS3 task is to search the bookcase on the northern wall near the entrance you came in. You should locate Zorgoth's Journal; the notes will indicate a strong distaste for the human population and confusion about the fact Jas has allowed them to live so long, especially as the Dragonkin are cursed. Due to this great distaste, Zorgoth has dedicated himself to punishing humans in Jas' name. He details his anger toward his incompetent assistant since the exit of Lacrussa and complains about Vorkath's affection for humans. This anger makes him wonder whether Vorkath would be more useful dead before going on to mention that Kerpac has been studying a black stone that can reanimate corpses to make them violent animals.
Next, in RS3 Requiem for a Dragon, you will read that Zorgoth replaced Vorkath's heart with one made from the black stone, mentioning also the experiments of Kranon using the same stone. He intended to make Vorkath have a pure burning hatred for humanity, and while the creature became hateful, he also became melancholy and wallowed around. It appeared the dragon no longer had the same love for humanity, but he still would not attack; Zorgoth declared the creature to be a failure and intended to find a new use for the stone.
After you read the journal, carry on with this Requiem for a Dragon RS3 guide by inspecting the Dragonkin mural on the west wall in the library. You will see the depiction of a huge dragon billowing flames in a far more aggressive manner than Vorkath has ever displayed. To the south, you will find a congealed potion on the floor; pick it up, and you will discover that in spite of the freezing temperature, the liquid within the bottle is not frozen. Lastly, search the shelves by the Archivist to find the broken focus that emits an unusually cold sensation.
Awaking the Archivist in Requiem for a Dragon RS3
With all of the items found, you can now discuss them with the Archivist. Below, we have listed what he will tell you about each of the items:
- Mural - Shows Vorkath as the weapon Zorgoth dreamt he would become.
- Potion - It seems to be poison brewed by Zorgoth's alchemist as a punishment to coerce Vorkath into cooperation.
- Focus - The Archivist was trying to keep tabs on the other Dragonkin to see if any breakthroughs had been made in ending their curse; instead, he found distrust and weakness in his kind.
- Crystal - He tells you of Kranon's failure and subsequent descent into madness through the use of the black stone. Some of the stone washed up on Ungael, and the Archivist intended to use it to control Vortkath.
Before the conversation comes to a close and you continue with this Requiem for a Dragon RS3 guide, the Archivist tells you that the assistants in the laboratory began to complain of imaginary songs, leading them to believe the black stone's corruption was bleeding into Ungael.
Requiem for a Dragon RS3 - The Corruption of Vorkath
After your struggle to find answers regarding Vorkath, return to Fort Forinthry and confront Zemouregal. Go to the floor and enter the floor hatch just east of the Command Centre to locate him. You can then approach him in a few ways, and depending on your skill, quest, and boss progression, the dialogue options will have varying degrees of success.
Dialogue One
Show off your Necromancy skills - At level 99, you will have a 50% chance of success, with the only guaranteed pass coming with level 120.
Gloat about defeating him in combat - You'll need to have at least ten kills in the Zemouregal and Vorkath encounter to pass this.
Mock his skeletal form - No requirements, always grants a pass.
Dialogue Two
Remind him of all the times you've defeated him - Always successful, regardless of progress with questing.
Remind him of when you worked together - Being granted a pass will vary depending on your progress/completion with Dishonor among Thieves, Eye of Het II, Aftermath, and having at least one kill in Zamorak, Lord of Chaos (normal) boss fight.
Dialogue Three
I have a soul, and you don't - No requirements, always successful.
I could bury you alive down here, and no one would care - No requirements, always successful.
Once you finalize all of this Zemouregal dialogue in RS3 Requiem for a Dragon, he will tell you Moia killed Bilrach and has been attempting to consolidate the power of all remaining forces of Zamorak.
If you ask about the scouts in Ungael, he will tell you Moia has shown interest in Ungael for a while now and has been searching for old power buried somewhere on the island. Zemouregal saw this as an opportunity and took Vorkath for himself, but this did not stop Moia from continuing her investigation. This leads you to believe there may be more secrets to discover.
You must then ask about Vorkath's soul, and Zemouregal will confirm that it has been corrupted. He then goes on to blame the corruption on his failure to win the Battle of Forinthry. This causes you to theorize that if you can cleanse the corruption, you will be finally able to set Vorkath's soul free. So, make your way to Death in the City of Um to see if he can assist with the cleansing.
Knocking on Death's Door
You'll find Death in the middle of the City of Um. Describe the situation Vorkath is in, and Death will tell you that your plan and its mechanics will contradict the work of Necromancy entirely, but it may just work. Death then informs you that when Rasial was a human named Misalionar, he was a Guthiian druid who did research on the purification of corrupted souls.
In his time, Misalionar was one of the most influential and renowned wizards, spreading the knowledge of Runes to the first settlers of Gielinor. As he and Death shared a close connection with Guthix, over the years they became good acquaintances. As time passed, Mislionar became more infatuated with death and grew paranoid; he then confided that he had a recurring nightmare of being smothered by black stone hands. These nightmares convinced him that sinister forces were at work, causing him to dedicate himself to counteracting them, whether that meant going against Guthix or not.
Death then tells you the last he heard from Misalionar was when he informed him of a new kind of focus that could push back shadows and light the way for wayward souls. Ask about the focus, and Death will point you to the Tree of Balance to the south of the Archeology Guild; he states that the tree was planted on a sacred site, once used to hold relics just like the focus.
Tree Talks in Requiem for a Dragon RS3
Your next task in RS3 Requiem for a Dragon is to talk with the Tree of Balance, who confirms the site it resides on is, in fact, sacred. The tree tells you it had been dormant for centuries before its planting and that its roots can sense ancient magic within the land.
When you ask the tree if the druids who planted it knew of the land's significance, it tells you that they did not know but that it is not the first time that this land has been used as a sacred grove. The tree will then state that the focus was torn apart in fear and that the pieces lie far in the west by the Memorial to Guthix before telling you if you are able to bring the pieces of the focus, it will be able to repair them.
The Memorial of Guthix
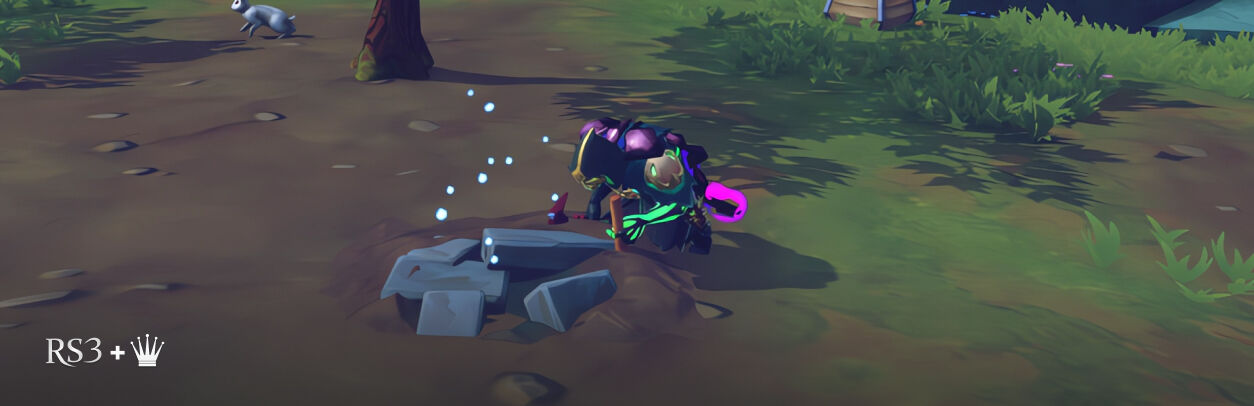
The memorial can be found south of Piscatoris; just outside of the memorial itself, you will find two patches of earthen clay; you'll need level 86 Archeology to uncover them. The western patch will provide a Damaged Soul Beacon (base), and the eastern a Damaged Soul Beacon (core). With both pieces now in your inventory, return to the Tree of Balance to continue with the adventure.
Repairing the Beacon
The Tree of Balance will repair the pieces, combining them to provide you with a Damaged Soul Beacon, stating that the beacon is still dormant. The tree then suggests that you restore the relic at an Archaeologist's workbench using the following materials:
- 30 White Marble
- 30 White Oak
- 5 Greater Ensouled Bars
After you have restored the Soul Beacon in Requiem for a Dragon RS3, return to the tree, and it will notice that Misolionar has left instructions on the focus; they read as follows:
For cursed souls who have undergone change at an elemental level, may this beacon allow one to commune with them, cleanse them, and change their fate.
The message deduces that the correct glyph order is Change/Elemental/Commune/Change. So, with your now restored focus, go back to Um and speak with Death once more.
When you show Death the focus, he will examine it briefly before stating that the ritual to cleanse the undead dragon's soul must be carried out twice. You must first do so at the Um ritual site, creating an anchor point for his soul. Then, you must perform the second near Vorkath on the surface at the Ungael ritual site. After this, Death will send you on your way to the first ritual.
Saving Souls in Requiem for a Dragon RS3
At the ritual site in Um, use the pedestal in the center and select the Soulfarer ritual; below are the requirements for this task:
- 75 Necromancy
- 6 Light sources
- 1 elemental II Glyph
- 2 Change II Glyphs
- 1 Commune II Glyph
After the ritual is completed, you will be rewarded a Soul Beacon, so head to Ungael to carry out the second ritual in RS3 Requiem for a Dragon.
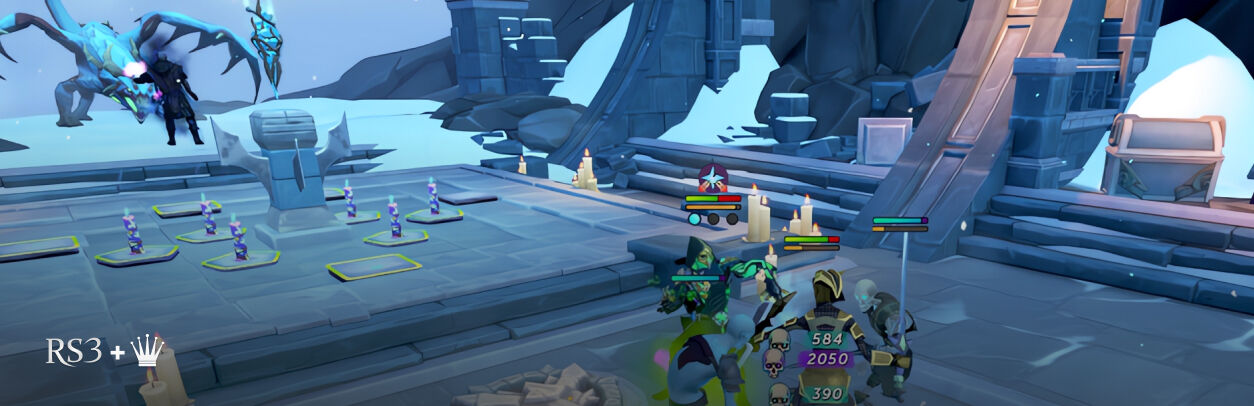
Use the rowboat near the Grove to get back to Ungael and ensure you have some armor, weapons, and food, as well as the materials for a second ritual. Go back through the Colossal Cave where Vorkath is hiding, and just east of the cliff, you will see the ancient ritual site and should be able to repair it. So, begin work repairing the pedestal, glyph spots, candle spots, and platform (you should repair a total of 13 objects); this will cost no materials and grant low Construction XP.
Carry out the ritual a second time and take note of the warning for upcoming danger.
When you begin the ritual, you will trigger a cutscene in which three entities approach the site: Vengeance, Bilrach, and a Mysterious Relic. Vengeance notes that the reports on Vorkath's presence were correct, and then he will spot you on the ritual site. Your character will be shocked by Bilrach's appearance as you thought him to be dead at the hands of Moia.
The group will continue their pursuit of the undead creature, stating that Vorkath's purpose goes far beyond what Zemouregal had intended for him.
At this point in Requiem for a Dragon RS3, the trio begins to use the Mysterious Relic to siphon power from Vorkath and the Black Stone, inflicting excruciating pain on the creature. Bilrach will take over the siphoning while Vengeance comes to deal with you and prevent your interference.
Of course, you must intervene, so prepare for a fight; Melee is Vengeance's combat method of choice. Once you have taken him down, start your second ritual, but expect Vengeance to respawn and continue his attack. The ritual will bring forth Shadow Rifts, dismiss them, and continue, and once you have completed it, Bilrach will tell you it is too late and your interference did nothing. Vorkath's body will then fall to the ground, lifeless.
The trio will teleport away, leaving you with the flashing beacon, which will soon vanish. You will be left with nothing but the undead (now dead again) dragon. Approach him and inspect his body. There will be no response and no sign of his soul; return to Death in the City of Um.
What Comes After
Tell Death of what occurred, and despite your worries that your attempt was a failure, he will encourage you, stating that perhaps the ritual was a success. He then tells you to head to the gardens in the southeast of Selene. Do so, and you will find the ghostly form of Vorkath sleeping in the grass. Approach him and tell him your joy for his passing over. He can not speak but will acknowledge you before returning to his long-awaited rest.
After this heartwarming encounter, it's time to carry out the final task of Requiem for a Dragon RS3 and confront Zemouregal about his claims that Moia had slain Bilrach. Head to his cell in Fort Forinthry, and he will be doubtful that Bilrach survived, stating Moia very publicly tore him to shreds in front of a crowd. After he says this, you will explain that Bilrach had a keen interest in the soul of the undead dragon; this prompts Zemouregal to ask you to explain in great detail what occurred on Ungael.
Even after your explanation, he still doubts Bilrach's survival, especially as Mahjarrat do not have souls to resurrect. This leads him to believe the Bilrach you saw on Ungael was not, in fact, him. However, when you try to decipher what he means by this, he will dismiss you, simply giving the ominous answer that this changes things.
Note: You must have three empty inventory spaces to receive the rewards from RS3 Requiem for a Dragon, so if you receive a message before speaking to Zemouregal, ensure you make room for them.
Requiem for a Dragon RS3 Rewards
When you come to the end of this exceptional adventure, here's what you can expect to obtain:
- 1 Quest Point
- 100,000 Necromancy XP lamp
- 100,000 Archeology XP lamp
- Zorgoth's ring
- Soulfarer title
- Ungael teleport incantation
- Ability to teleport to the Ungael ritual site using the Tome of Um 2
- 2 Treasure Hunter Keys
Along with the above rewards, you'll also gain access to the ritual site on Ungael, as well as a new yet-to-be-detailed song to add to your in-game playlist.
Requiem for a Dragon RS3 - FAQ
With your average RS3 quest, some head-scratchers keep you wondering for days, so it goes without saying that this new and unexplored land will have you just as confused, if not more so. So, to negate all of that confusion, Chicks Gold has found the answers to some of the most frequently asked questions regarding this new adventure; take a look below:
How long is Requiem for a Dragon in RS3?
The quest is speculated to be around 'medium' length, meaning it can take anywhere from 45 minutes upwards if played out properly. This means paying attention to the dialogue, not skipping cutscenes, etc. However, if you choose to play in a speedrun fashion, the quest can be carried out in under 20 minutes.
Is this a member's quest?
Yes, as with all the Fort Forinthry quests, this is also a Members-only quest. So, if you want to get in on the action, update that membership and get questing!
Is RS3 Requiem for a Dragon a direct requirement?
As of now this quest is not a direct requirement; however, as we all know, the ever growing world of Gielinor is subject to change at any time. And given the cryptic response from Zemouregal at the end of this adventure, we can only speculate about the new adventures ahead.
Vorkath Finally Rests
After a tiresome and emotional journey, you finally did it; the misunderstood creature is finally at rest. We're sure after a taxing journey, you're ready for your rest, but when the time comes to get back to questing, ensure you check out our blog section for even more exciting RS3 reads. You can also make use of our outstanding RS3 gold page, where you can stock up your in-game bank without making a dent in your real one! However you choose to navigate the world of Gielinor, keep Chicks Gold in mind to be a helping hand until next time!